So if you're reading this you probably know me already, but for those of you who don't, I'm Adrian Kelly, a high school senior at the Vermont Commons School and someone fascinated by problem solving, technology, and engineering.
I have
another blog that hasn't been updated in a few months, but this one is devoted to my project to build a modular electric bicycle system for my Social Studies class. I chose this project not only because it thought it would be fun to build and ride, but also because climate change and air pollution are going to be increasingly large problems in the coming years. As huge numbers of people, particularly in China and India, rise out of poverty, they need a mode of transportation and cars, even electric ones, are much too heavy and wasteful for everyone to have. As prices have dropped over the last couple of years, electric bicycles have taken off in developing nations as a cheap method of personal transportation, in large part because of the restrictions on the numbers of gas vehicles that can enter Chinese cities each day. From what I've seen, there is an absence of this type of electric bike, that is cheap, relatively easy to install, powerful, and efficient. The final reason I am doing this project is that I think I will learn a lot about the designing and building process, and this is something that I intend to actually use, so hopefully I will also learn how to make this bike more reliable than my projects have been in the past.
There are a lot of electric bicycles in the world now, from the commercial bikes with custom-designed frames to the front wheels you can buy with motor and battery integrated into the hub. I wanted to make it modular so that it is possible to add the motor, gearbox, and batteries to a bike fairly easily and without permanently damaging it, making it accessible to more people and allowing components or even the whole bike to be upgraded easily. The vast majority of ebikes sold today use hub motors, which have the motor built into the wheel because that is easy and cheap to implement, but after a lot of research, I found a different solution that made a lot more sense.
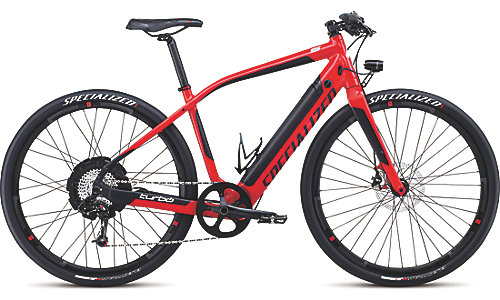 |
| Specialized Turbo S with a hub motor in the rear wheel and the battery hidden in the frame. Specialized.com |
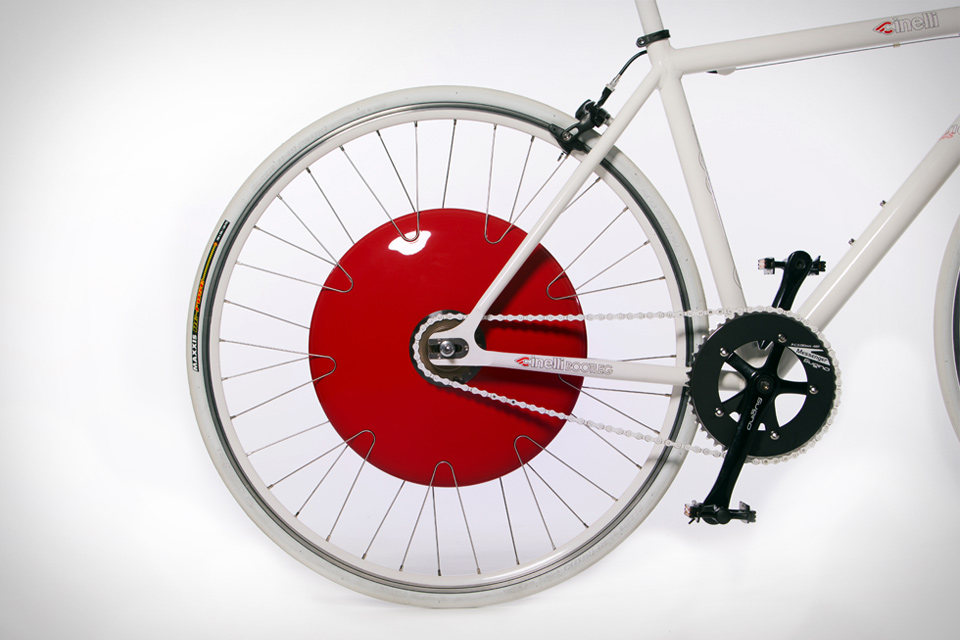 |
| Copenhagen Wheel with everything in the hub. Uncrate.com |
The basics of my design is based around maximum efficiency and power on a budget. This means using high speed motors going through speed reductions, and then using that to drive the crank, which is known as a mid-drive system. The first half of my design is the fast motor. The hub motors have to spin at the speed of the wheel, on the order of several hundred rpm, which is quite slow by motor standards. The faster motors use more voltage and less current for the same power and therefore lose less energy to heat, and the fast speed, generally 5-20 thousand revolutions per minute, is then reduced to a usable speed and torque with gear, belt, or chain reductions. I am going to use a brushless motor, which is more efficient and more powerful than brushed because there is no sparking on the brushes, and a combination of chains and toothed belts. The only commonly available high speed brushless motors are for the remote control airplane industry, some of which are actually quite large.
 |
| Two large brushless outrunners. Charles Guan |
The second part of the design is the mid-drive setup. Hub motors are commonly found on electric bicycles because they are fairly simple and cheap, but besides being usually low power they are stuck in one gear ratio. Every motor, like every person, has an optimal speed at which to spin their rotor or legs. Hub motors are like like riding a fixed gear bicycle, meaning that it is difficult to get started or go up hills because you must push so hard and it is difficult to go fast because you must spin your legs so quickly. With the ability to change gears, you can always pedal at the optimal speed, climb hills much quicker and have a higher top speed, as well as the fact that your legs aren't burning as much when you're done. By connecting the motor to the cranks instead of directly to the wheel, I am utilizing the existing bicycle drivetrain to provide the adjustable gear ratios, something that would be tremendously difficult to build.
 |
| A homemade mid-drive bicycle. ElectricBike.com |
In the last year or so, the electric bicycle manufacturers and high end companies looking to get into the business have started to see the advantages to mid-drive high rpm drivetrains. A number of polished looking mid-drive bicycles have come onto the market recently from companies such as
Bosch, Trek, Daum, Panasonic, and
Audi but they all cost thousands if not tens of thousands of dollars.
 |
Brose 450w mid-drive with belt. ElectricBike.com
|
They nearly all have the battery built into the frame and the motor and reduction system built into the crank spindle (called the bottom bracket), things that are not possible without a custom frame.
 |
| Trek/Bosch mid-drive with gears. ElectricBike.com |
Only a few have released details, but it seems there is a split between using gears or belts for the reduction inside the bottom bracket, with gears being stronger and smaller while belts are cheaper, quieter, and more resistant to dirt and grime.
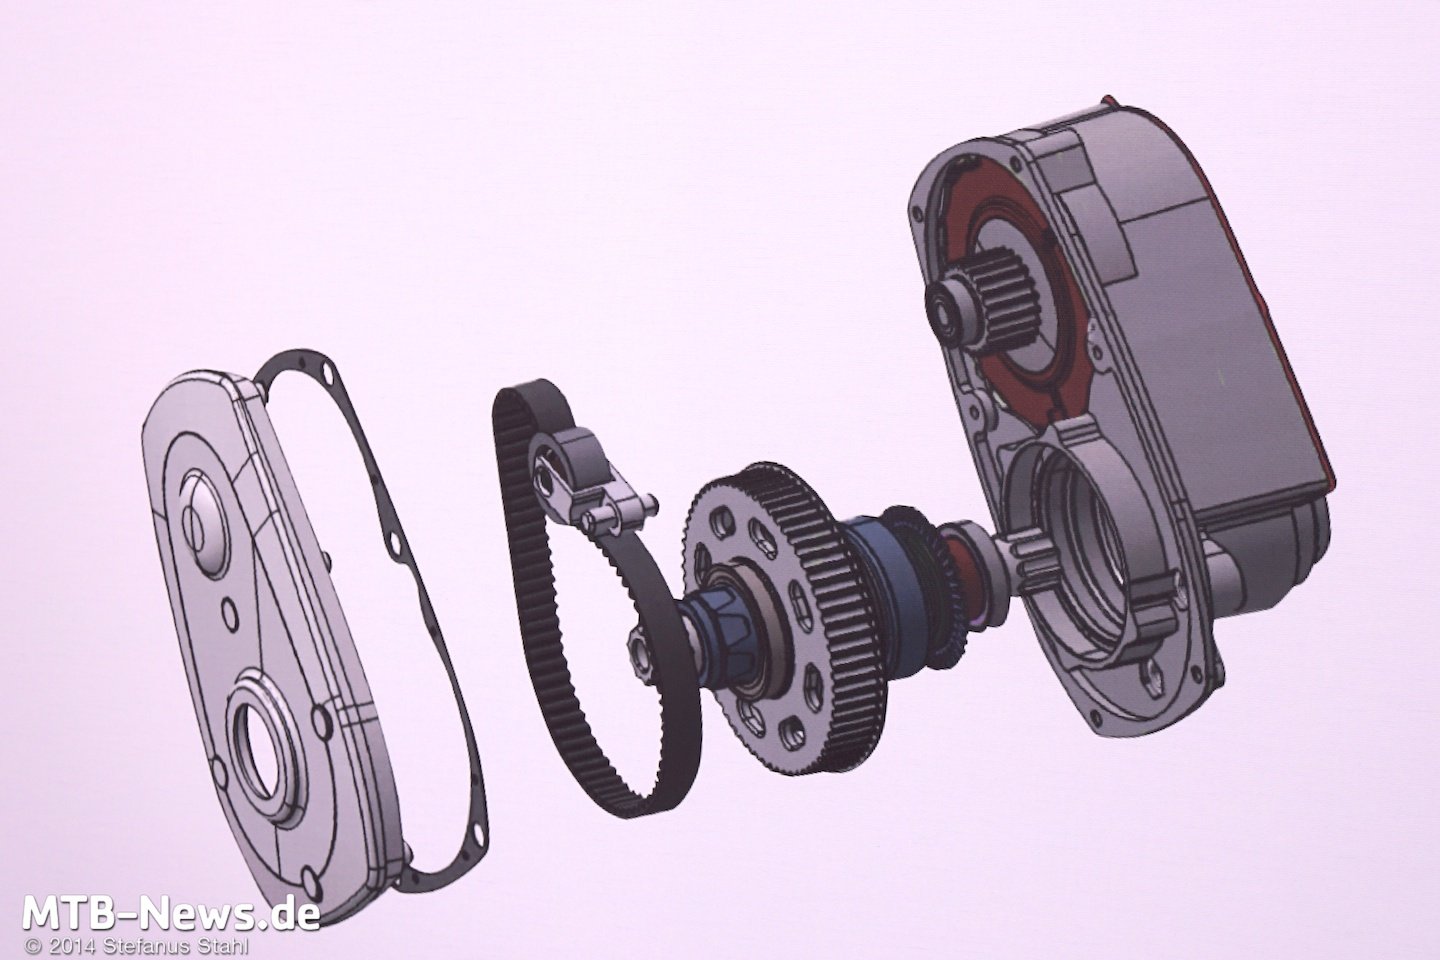 |
| Exploded CAD view of Brose belt reduction. MTB-News.de |
 |
| Bosch gearbox cutaway view. ElectricBike.com |
I thought up this bike project in July 2013 while taking a CAD (Computer Aided Design, like the diagram above) class at UVM, and came up with a quick CAD model and parts list. That August, I bought a cheap mountain bike (A Mongoose Torment if anyone cares) off Craigslist, and have been slowly working on it slowly ever since. I replaced the shifters and grips because they felt super cheap, replaced the cables while I was at it, removed the decals, and replaced the rear derailleur because it was bent. This summer I bought the parts to make the box that will house the motor and controller, and machined the HDPE clamps that go around the seatpost and can be seen in the picture.

The design in my head and parts list has continued to evolve, and I made some simple CAD models with OpenSCAD, which is horribly inferior for most things compared to software like Solidworks which I learned at UVM, but I need to make a better CAD model so I know everything fits and have something to work off of. This means either getting Windows to work on my desktop so I can install and learn Autodesk Inventor or spending lots of time in the UVM computer lab. I also have a
spreadsheet for listing the parts and costs as well as doing gearing and speed calculation.
I need to figure out whether to use Lithium-Ion batteries, which are lighter, more powerful, and store more energy, or Lead-Acid batteries, which I got for free, and also whether to upgrade the chainrings and freewheel or leave the current ones. I'll probably just make it with the cheapest components possible and upgrade later if it's not good enough.
Right now I have a small pile of parts, shown below in my first attempt at
knolling. The square aluminum extrusion is the frame for the motor and reduction system, with shaft collars as well as radial and thrust bearings on top. I have five lead acid batteries, 12V 7.2Ah, from old UPS's at my dad's work which have unknown life left, and will choose the best three to use. Also shown is my controller, a
Mini Jasontroller from the supremely cheap and somewhat shady ELifeBike.com, and my throttle on the right. Finally, there's a precharge resistor and switch.
In terms of actually building, I could work on either the electrical or mechanical side first, because neither depend on the other. The electrical side just needs the motor and some large connectors for the power before I can get the motor running. The mechanical side, on the other hand, needs the chain, sprockets, shaft, pulleys, and belt, and I need to get some holes and slots accurately cut in an aluminum extrusion which will probably require a machine shop.
But first, another blog post about all the awesome stuff I saw at the MIT Mini Maker Faire!


No comments:
Post a Comment